

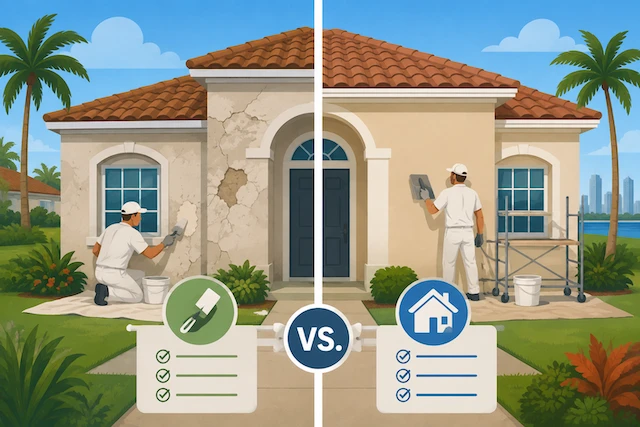
You notice a crack running down the side of your house after a heavy rain, and suddenly you’re standing in the driveway wondering what it’s worth. Is that a cosmetic blemish you can patch over a weekend, or the first sign of a wall that needs to come down to the block? It’s a question almost every South Florida homeowner faces eventually, because stucco is everywhere here.
The good news: most stucco problems are repairable, and most repairs are affordable. The trick is knowing which ones aren’t. This guide walks through how to tell the difference, what each path costs in Florida in 2026, and when the numbers make full replacement the smarter play.
Why Stucco Needs Extra Attention in South Florida
Traditional stucco is a three-coat system: a scratch coat, a brown coat, and a finish coat applied over metal lath and a weather-resistant barrier. When it’s installed right, it’s tough, breathable, and can easily last 50 to 80 years. That’s why so many homes in Miami, Fort Lauderdale, and Boca Raton are built with it over concrete block.
But Florida is one of the most demanding environments for stucco in the country. Humidity routinely sits above 80 percent. The sun bakes the same wall every afternoon. Coastal homes add salt air into the mix. And our storm season delivers wind-driven rain that finds the tiniest gap around a window or a control joint and turns it into a leak. The result is that stucco here ages faster than it does in drier climates, and the paint protecting it needs refreshing every five to seven years, not every decade.
There’s also an important distinction to make before anything else: traditional cement stucco versus EIFS, the synthetic foam-and-acrylic system that’s often called “synthetic stucco.” If your wall sounds hollow when you knock on it, you likely have EIFS. It’s lighter and cheaper to build with, but it has no drainage plane and traps moisture by design, which makes failures more expensive when they happen. Traditional stucco sounds solid, more like knocking on brick. Knowing which one you have changes both your repair options and your budget, so if you’re not sure, that’s worth settling before you get a single quote. And if you’re choosing an exterior finish from scratch rather than repairing what’s already there, our comparison of stucco vs. paint vs. cladding walks through how each one holds up in this climate.
Start With a Simple Assessment
Before you decide between repair and replacement, spend a little time figuring out what you’re actually dealing with. Most decisions can be made with a walk around the house, a flashlight, and a rubber mallet.
Tap the wall in a grid pattern with the mallet or your knuckles. Solid stucco gives a sharp, consistent sound. Delaminated sections — where the stucco has separated from the layer beneath it — sound hollow and dull. Map every hollow spot you find, because their total area matters a lot for the decision.
Then check the usual trouble zones: around windows and doors, along the base of walls, near irrigation heads, and on shaded elevations that stay damp. Window and door flashing failures are the single most common source of moisture intrusion behind stucco in Florida homes, so give every sealant joint a close look. If you see interior water staining or a musty smell near an exterior wall, that’s a red flag that moisture has already moved through the system.
If you’re seeing any of the serious warning signs below, a professional moisture inspection is the best money you’ll spend. It typically runs $200 to $500, and it answers the one question that matters most: is water behind the wall? That single fact decides whether you’re looking at a $500 fix or a $15,000 one.
When a Repair Is the Right Call
A lot of stucco damage looks worse than it is. Here’s where a targeted repair handles the problem completely, at a fraction of the cost of replacement.
Hairline and stable cracks
Cracks under about one-eighth of an inch that haven’t grown in six months are almost always cosmetic. They’re caused by normal thermal movement — the wall expands in the afternoon heat and contracts overnight. Seal them with a flexible elastomeric caulk or patching compound that moves with the wall, and they’re done. This is one of the few stucco jobs that’s genuinely DIY-friendly.
Impact damage
A fallen palm frond, a ladder scrape, a bike leaned against the wall — isolated damage like this doesn’t mean the system is failing. As long as the lath behind the damage is intact and the surrounding stucco is sound, a skilled patch brings it back to original condition, texture and all.
Efflorescence and surface staining
Those white, chalky deposits you sometimes see on stucco are efflorescence — mineral salts carried to the surface by moisture. A low-pressure wash usually removes them, and sealing the wall prevents them from coming back. If they keep reappearing, though, you have a moisture problem behind the surface, and that’s a different conversation.
Isolated damage under a quarter of a wall
Industry guidance is that when less than roughly 25 percent of a wall plane is affected — and the lath and barrier behind it are sound — repair is the right answer. Spot repairs in Florida typically run $300 to $1,500 per area depending on size and how closely the texture needs to match, with standard patch work priced at $8 to $20 per square foot.
When Replacement Is Non-Negotiable
Some damage can’t be patched, no matter how tempting the price of a quick fix is. These are the signs that the system itself has failed.
Delamination beyond a small area
If hollow sections cover more than about a quarter of a wall, or the stucco is visibly pulling away from the lath, patching is a temporary bandage. Moisture has broken the bond, and a patch over delaminated stucco typically fails within two to three years. You’d be paying to repeat the job, not finish it.
Stair-step and horizontal cracks
Stair-step cracks that follow the block joints usually mean the wall behind the stucco is moving, which points to foundation settlement. Horizontal cracks along the base often mean the bottom course has separated from the lath. Both are structural red flags that will reopen after they’re patched unless the underlying movement is addressed first.
Spongy, soft, or bulging walls
If you can press the wall inward with moderate hand pressure, or you see a ripple or bulge across the surface, moisture has compromised the bond between the stucco and the substrate. Water is already inside the wall, and the framing may be at risk.
Mold at the base of walls or around windows
Visible mold means the weather-resistant barrier, flashing, or both have failed. New stucco applied over a compromised barrier simply traps the moisture again. The barrier has to be exposed and replaced, which means the old stucco has to come off.
Corroded lath
In coastal areas, salt air can corrode the galvanized metal lath over time, especially on older homes near the water. Once lath is corroded, it’s lost its structural job and the stucco will keep separating regardless of how well the surface is patched.
EIFS with moisture intrusion
If you have synthetic stucco and moisture has found its way in, the standard recommendation is to re-clad with traditional three-coat stucco over a proper weather barrier. EIFS can’t be reliably repaired once water is trapped, and its failures run $60 to $120 per square foot or more when substrate damage is involved.
When water has reached the sheathing or framing, repairs jump to $30 to $50 per square foot, and total jobs often land between $4,000 and $10,000 — before you even get to the visible stucco. At those numbers, the comparison stops being about the patch and starts being about the whole wall.
The 30 Percent Rule and the Math Behind It
Contractors use a simple rule of thumb: once more than about 30 percent of a wall plane needs repair, or moisture has reached the sheathing anywhere, full replacement is usually cheaper over a ten-year window than chasing repeat patches. Run the math and you’ll see why.
Say a cracked elevation needs patches every couple of years at $1,500 a pop. Over a decade, that’s $7,500 or more — and you still have a wall that’s failing in new places. Meanwhile, a full three-coat re-stucco at $7 to $14 per square foot handles the entire surface once, resets the weather barrier, and comes with a fresh warranty. If you’re patching eight to ten areas across the house, you’ve effectively already spent your way toward replacement.
The same logic applies to moisture. If an inspection shows water behind the wall, every dollar spent on surface repair is a dollar spent on a problem that’s still advancing. Fixing the root cause once is almost always cheaper than maintaining the symptom.
What Full Stucco Replacement Costs in Florida
For a typical Florida home with 1,500 to 2,000 square feet of exterior wall, a complete re-stucco — tear-off of the old material, new lath and weather barrier, and a full three-coat application — runs roughly $9,000 to $18,000. Homes with two stories, complex rooflines, or significant substrate damage push toward $21,000 to $28,000.
A few line items catch homeowners off guard, so budget for them:
- Painting comes after, not before. New stucco needs about 28 days to cure before paint can be applied, and two coats of quality masonry paint add roughly $3,000 to $5,000 to a full re-stucco project.
- Texture matching costs extra. Knockdown and skip-trowel finishes take more skill and more time than a flat finish, which pushes the per-square-foot price up.
- EIFS removal costs more than traditional stucco removal, both because the material is harder to strip and because the damage behind it is usually worse.
- Scaffolding on multi-story homes adds real money, as does debris hauling and disposal.
If the paint on your current stucco is already failing, the replacement project is a natural moment to pick the right color once and stop repainting for a decade. It’s also a good time to think about the exterior as a whole — our guide to exterior paint colors for South Florida homes covers how the climate should shape that choice.
What the Work Actually Looks Like
A professional stucco repair
The contractor cuts the damaged area back to sound material, treats or replaces any exposed lath, and rebuilds in layers — scratch coat, brown coat, finish coat — matching the surrounding texture as they go. Then the section cures, gets primed, and is painted to blend with the wall. A good texture match is the difference between “you can’t find the patch” and “what happened to that wall,” so ask for a sample patch on an out-of-the-way spot before approving the full job.
A full re-stucco
Windows, doors, and landscaping get protected first. The old stucco is torn off down to the block or sheathing, and the substrate is inspected. Lath with more than about 10 percent surface rust gets replaced, along with any compromised weather barrier. Then casing beads and control joints go in, and the three coats go on with proper curing between them — typically 48 hours or more of moist curing for each coat in our dry season. After roughly a month of total cure time, the paint goes on and the job is done.
Since the scaffold is already up, this is the smart moment to have window and door flashing inspected or replaced — the number one moisture entry point in Florida homes. It’s also the easiest time you’ll ever have to upgrade aging windows or doors while they’re a single contractor call away. Our doors and windows guide for Florida homeowners covers what’s worth upgrading, and the cost comparison of impact doors vs. hurricane shutters shows where the money goes if you want full storm protection.
Permits and the Florida Building Code
Full stucco replacement is a weatherproofing assembly, which means it requires a permit and inspections in most South Florida jurisdictions. Patch repairs below a defined area threshold may qualify for minor-repair exemptions, but the rules vary by city, so verify with your local building department before work starts. In Miami-Dade and Broward, the High-Velocity Hurricane Zone provisions of the Florida Building Code add stricter wind-driven rain requirements that a licensed contractor will already know — and that an unlicensed one won’t. As our article on what happens when you renovate without permits in Miami makes clear, skipping the paperwork to save a few hundred dollars is the kind of shortcut that shows up at closing, in an insurance claim, or on the next owner’s inspection report.
Any contractor you hire for a stucco system should be state-certified through the Florida Department of Business and Professional Regulation. Ask to see the license and the certificate of insurance before anyone takes a hammer to your wall.
DIY vs. Hiring a Pro
A small slice of stucco maintenance is legitimately DIY. Sealing a stable hairline crack with elastomeric caulk, or low-pressure washing mold and efflorescence off a shaded wall, are projects most homeowners can handle in an afternoon.
Everything else should go to a professional. Cracks wider than an eighth of an inch, cracks that are growing, delamination, soft spots, and anything that hints at moisture behind the wall all need an experienced hand and proper diagnosis. A bad patch job traps moisture and accelerates the very damage it was meant to fix — the cheapest option is often the most expensive one in the long run.
How to Make Your Stucco Last After the Fix
The repairs that hurt are the ones that come back, and most come back because the underlying conditions never changed. A few habits keep your stucco healthy for decades:
- Repaint every five to seven years with an elastomeric masonry paint that flexes with the wall.
- Keep irrigation heads aimed away from the walls, and trim landscaping back from shaded elevations where mold loves to grow.
- Make sure gutters and downspouts carry water away from the foundation, and keep the weep screed at the base of the wall clear.
- Walk the perimeter after every named storm and photograph any new cracks so you can tell whether they’re growing.
- Reseal around windows and doors the moment you see cracked caulk or separated edges.
Moisture management is the whole game, and it applies to the rest of the exterior too. That’s why keeping surfaces sealed and water moving away from the house — the same logic that keeps unsealed pavers from attracting mold and weeds — is the single best thing you can do for your home’s envelope. If you’re already planning exterior work, hardening your home against storms and insurance scrutiny at the same time stretches every dollar further.
Questions to Ask Before You Sign
- Will you run moisture testing and tap-testing before you quote, or is this a visual estimate?
- Can you do a sample patch so I can approve the texture match?
- Who pulls the permit, and what do inspections cover?
- Does your price include new lath and weather barrier, or is that a change order?
- What’s your workmanship warranty, and does it cover the paint?
Straight answers to those five questions separate a real contractor from someone who’s going to discover “surprises” after the deposit clears.
The Bottom Line
Stable hairline cracks and isolated damage are repairs — a few hundred to a couple of thousand dollars, and they’re done. Hollow sections, mold, spongy walls, and widespread cracking are replacement territory, where every dollar spent on patching is a dollar spent on a system that’s still failing. And when you’re genuinely unsure, a few hundred dollars on a moisture inspection is the cheapest insurance you’ll ever buy.
Your stucco is the first line of defense between South Florida weather and everything inside your walls. Treat it that way, and a well-maintained exterior will keep protecting your home — and its value — for decades. If you’re seeing the warning signs and want a straight assessment of what your home actually needs, the stucco repair and replacement team at Top Renovations will walk your walls, explain what you’re looking at, and quote the work honestly. Get a free estimate and find out which path — repair or replacement — is the right one for your home.