

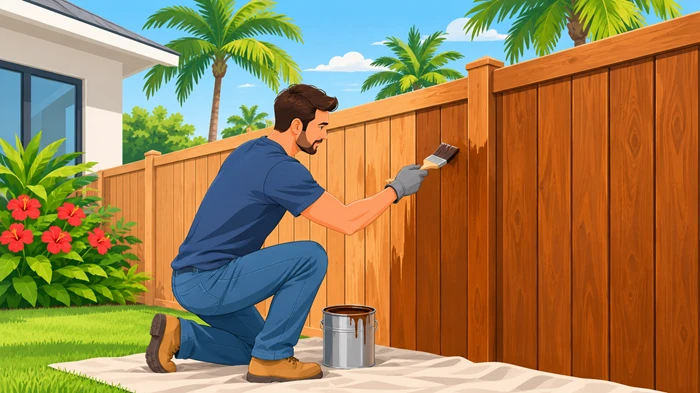
A well-maintained fence does more than define your property. It adds privacy, improves curb appeal, and protects your outdoor space. However, constant exposure to sunlight, rain, humidity, and changing weather conditions can gradually affect its appearance. Learning how to stain a fence properly helps preserve the wood, enhance its natural grain, and extend its lifespan.
In South Florida, where intense UV exposure, heavy rainfall, and moisture are common, regular fence maintenance is particularly important. Applying the right stain at the right time can help prevent premature fading, moisture damage, and surface deterioration. Whether you are refreshing an older wooden boundary or finishing a newly installed one, following the correct preparation and application process makes a noticeable difference.
Key Takeaways
-
Proper cleaning and preparation are essential for an even, long-lasting finish.
-
Choose a stain designed for outdoor wood and South Florida weather conditions.
-
Allow sufficient drying time before applying the first coat.
-
Regular inspection and maintenance help protect wood from moisture and sun exposure.
Why Staining a Fence Is Important
Wooden fences naturally change over time. Sunlight breaks down the wood’s surface, while rain and humidity encourage moisture absorption. Without proper maintenance, the boards may become faded, discolored, rough, or more vulnerable to deterioration.
Choosing to stain a fence provides several benefits beyond improving its appearance.
1. Protects Against Moisture
Wood absorbs water, particularly in humid environments. Excessive moisture can contribute to swelling, warping, cracking, and fungal growth. A suitable exterior stain helps reduce water absorption while allowing the wood to retain its natural characteristics.
2. Reduces Sun Damage
Strong sunlight gradually breaks down wood fibers and causes fading. A quality exterior stain with UV-resistant properties helps slow this process and maintain a more consistent appearance.
3. Enhances Natural Wood Grain
Unlike solid paint, many wood stains allow the natural grain and texture to remain visible. Homeowners can choose transparent, semi-transparent, or solid-color finishes depending on their preferred appearance and protection requirements.
4. Improves Long-Term Maintenance
Regular treatment helps preserve the wood and reduces the likelihood of extensive repairs. A properly maintained fence can remain attractive and functional for years.
When Is the Best Time to Stain a Fence?
Weather conditions play an important role in achieving a consistent finish. Applying stain during unsuitable conditions can lead to uneven absorption, slow drying, and poor results.
The best time to stain a fence is generally during a period of mild, dry weather with moderate temperatures and low chances of rainfall.
For South Florida homeowners, spring and early fall can offer suitable opportunities, although daily weather conditions matter more than the season itself.
Consider these factors before starting:
-
Temperature: Follow the manufacturer’s recommended application temperature range.
-
Rain forecast: Avoid application when rain is expected before the product has dried.
-
Humidity: High humidity can slow drying and affect application results.
-
Direct sunlight: Extremely hot surfaces may cause the stain to dry too quickly.
-
Wind: Strong winds can carry dust and debris onto freshly treated boards.
Always check the product instructions before beginning. Different formulations have different drying and curing requirements.
How to Stain a Fence: Step-by-Step Instructions
Following a systematic process helps achieve a smooth, attractive finish while ensuring the wood receives adequate protection.
Step 1: Inspect the Fence and Prepare the Area
Start by examining the entire structure. Look for loose boards, damaged sections, protruding nails, mildew, and signs of rot.
Repair or replace damaged components before applying any product. Staining over deteriorated wood will not resolve underlying structural problems.
Remove nearby furniture, outdoor decorations, and plants that could be affected by cleaning solutions or stain. Cover concrete surfaces, walkways, and landscaping with suitable protective materials.
This preparation creates a safer and cleaner working area.
Step 2: Clean the Wood Thoroughly
Dirt, mildew, algae, and old surface residue can prevent stain from penetrating evenly.
Use a suitable exterior wood cleaner and follow its application instructions. A soft-bristle brush can help remove stubborn buildup without unnecessarily damaging the wood.
For pressure washing, use an appropriate low-pressure setting and maintain a safe distance to avoid damaging the wood fibers.
Once cleaning is complete, rinse away the remaining solution and allow the surface to dry thoroughly.
Step 3: Sand Rough or Uneven Areas
After the wood has dried, inspect the surface again. Sand rough patches, splintered edges, and raised wood fibers using suitable sandpaper.
For most general preparation, medium-grit sandpaper can help smooth the surface without removing excessive material.
Pay attention to corners, edges, and areas where previous coatings remain. Remove sanding dust before moving forward.
Proper sanding improves stain absorption and helps create a more consistent finish.
Step 4: Choose the Right Wood Stain
Selecting an appropriate product is one of the most important decisions in the process.
Outdoor stains are available in different finishes, each offering a distinct appearance.
-
Transparent stain: Highlights the natural grain while adding subtle color.
-
Semi-transparent stain: Adds more noticeable color while allowing the wood texture to show.
-
Semi-solid stain: Provides stronger color coverage with some visible grain.
-
Solid stain: Offers a more uniform appearance and greater coverage of existing discoloration.
For humid coastal environments, choose an exterior-rated product specifically suitable for the wood species and exposure conditions.
Check whether the existing surface has an old coating. Some products require additional preparation or removal before application.
Step 5: Apply the First Coat Evenly
Once the surface is clean, dry, and properly prepared, begin applying the stain.
Use a quality brush, roller, or garden-compatible stain sprayer, depending on the product instructions and fence design.
Work in manageable sections, following the direction of the wood grain. Apply an even layer and pay attention to board edges, joints, and exposed end grain.
Avoid leaving thick puddles or overlapping wet sections excessively, as these can create darker patches.
For larger projects, a combination of spraying and back-brushing can help distribute the product more evenly.
Step 6: Allow the Stain to Dry Properly
Drying time depends on the product formulation, temperature, humidity, and wood condition.
Do not assume that a surface is ready for another coat simply because it feels dry. Follow the manufacturer’s recommended recoat interval.
Some products require only one application, while others benefit from additional coats. Applying too much product can result in a sticky or uneven surface.
Patience during this stage helps stain a fence successfully without compromising the finish.
Step 7: Inspect the Final Finish
Once the recommended drying period has passed, inspect the entire structure in natural daylight.
Look for missed areas, uneven coverage, and visible drips. Follow the product instructions when correcting imperfections or applying additional treatment.
Remove protective coverings carefully and clean your equipment according to the manufacturer’s recommendations.
A final inspection ensures that the completed project looks consistent from different angles.
Common Mistakes to Avoid When Staining a Fence
Even good-quality products can produce disappointing results when preparation or application is rushed.
Here are some common mistakes worth avoiding.
Skipping Surface Preparation
Applying stain over dirt, mildew, or peeling finishes can prevent proper penetration. Cleaning and sanding should always come before application.
Applying Stain to Wet Wood
Moisture trapped inside the boards can interfere with absorption. Allow sufficient drying time after washing, especially during humid weather.
Using Too Much Product
Thick applications may create sticky patches, uneven color, and longer drying times. Follow the recommended coverage rate instead of assuming additional product provides better protection.
Ignoring Weather Conditions
Sudden rain, excessive heat, and high humidity can affect the finished appearance. Check the forecast and product instructions before starting.
Neglecting Regular Maintenance
A single application does not eliminate future maintenance. Inspect the wood periodically and address fading, peeling, or moisture-related problems early.
How Much Does It Cost to Stain a Fence?
The total expense depends on fence length, height, wood condition, accessibility, stain quality, and labor requirements.
DIY projects generally involve the cost of cleaning products, sandpaper, brushes, protective materials, and the stain itself. Professional services may include surface preparation, minor repairs, product selection, and application.
For a more detailed understanding of local pricing, homeowners can explore this guide to fence costing in South Florida.
When estimating a project, consider the condition of the existing wood rather than calculating expenses based on surface area alone. Older structures may require additional cleaning, sanding, or board replacement.
Professional Fence Staining vs. DIY: Which Is Better?
Staining can be a manageable home improvement project, but larger structures and heavily weathered wood often require more preparation and experience.
A DIY approach may work well for smaller projects with minimal surface damage. Professional assistance can be more practical when the structure has extensive discoloration, difficult-to-reach sections, or previous coating problems.
Before hiring a professional, compare the preparation process, products, expected finish, and overall service costs.
Homeowners planning broader outdoor improvements can also consult a qualified fence contractor south florida to discuss installation, repairs, and maintenance requirements.
When Should You Hire a Professional?
Consider professional assistance when:
-
The wood has extensive mildew, discoloration, or surface damage.
-
Previous coatings need specialized removal.
-
The project covers a large outdoor area.
-
You want consistent coverage across multiple sections.
-
You need repairs before applying a protective finish.
The right professional can also identify structural issues that ordinary surface treatment cannot resolve.
Important Fence Maintenance Tips for South Florida
South Florida’s tropical climate creates additional maintenance challenges. The wet season generally runs from May through October, bringing increased humidity, rainfall, and frequent thunderstorms. The drier months, from November through April, often provide more convenient conditions for outdoor maintenance.
Here are some practical ways to maintain your wooden outdoor structure.
1. Inspect the Wood Regularly
Check for loose boards, cracks, discoloration, mildew, and areas where water collects. Early repairs can prevent minor issues from becoming expensive structural problems.
2. Keep Vegetation Away
Trim shrubs and branches that remain in constant contact with the wood. Better airflow helps surfaces dry more effectively after rainfall.
3. Clean Dirt and Organic Growth
Remove accumulated dirt, leaves, and mildew using appropriate wood-cleaning products. Avoid aggressive cleaning methods that damage the surface.
4. Reapply Protective Treatment When Needed
Do not follow a fixed maintenance schedule without considering the wood’s condition. Sun exposure, rainfall, product quality, and the original preparation all influence how long the finish lasts.
A simple water-drop test can help assess whether exposed wood is absorbing moisture, although the stain manufacturer’s instructions should determine whether another application is appropriate.
5. Address Repairs Before Refinishing
Replace severely damaged boards and address loose posts before beginning another treatment. Correct structural problems first so the new finish does not simply cover existing damage.
Additional Considerations Before Starting a Fence Project
Staining is only one part of maintaining a property boundary. The underlying structure, material selection, and installation quality also influence long-term performance.
For homeowners considering a replacement, it is worth exploring wood fencing pros and cons in South Florida before selecting a material.
Proper construction matters as well. Issues such as uneven board placement and poorly positioned supports can affect stability and appearance. Learn more about correcting fence post spacing when planning a new installation or repairing an existing structure.
Local requirements should also be checked before construction or replacement work begins. Read this guide to obtaining a permit to replacing a fence to understand the permitting considerations in Fort Lauderdale.
How Top Renovations Can Help
Top Renovations is a home renovation company in South Florida, helping homeowners improve and maintain their properties through renovation and exterior improvement services.
From planning outdoor upgrades to addressing property improvement requirements, the company focuses on practical solutions that complement each home’s needs. Homeowners looking for reliable renovation guidance can discuss their project requirements with the team.
A properly planned project, combined with suitable materials and regular maintenance, can help preserve the appearance and functionality of your outdoor space.
Conclusion
Learning how to stain a fence is a useful way to maintain wooden outdoor structures and improve their appearance. The most important steps are proper inspection, thorough cleaning, surface preparation, suitable product selection, and careful application.
For South Florida homeowners, paying attention to humidity, rainfall, and sun exposure is especially important. A well-maintained wooden structure can remain attractive and functional with periodic inspections and timely treatment.
Whether you plan to complete the work yourself or seek professional guidance, taking the right approach from the beginning helps protect your investment and reduces avoidable maintenance problems.
Frequently Asked Questions
1. How often should a wooden fence be stained?
The maintenance interval depends on the stain, wood type, weather exposure, and visible signs of wear.
2. Can you stain a fence without pressure washing?
Yes. A suitable wood cleaner and scrubbing brush can remove dirt and surface buildup without pressure washing.
3. How long should wood dry before staining?
Drying time varies, but wood must be thoroughly dry; follow the product instructions and check moisture conditions before application.
4. Is oil-based or water-based stain better for outdoor wood?
Both can work well; the right choice depends on the wood species, desired appearance, exposure, and manufacturer’s recommendations.
5. Can you apply a new stain over an old one?
Yes, in some cases, but the existing coating must be compatible with the new product and properly prepared.