

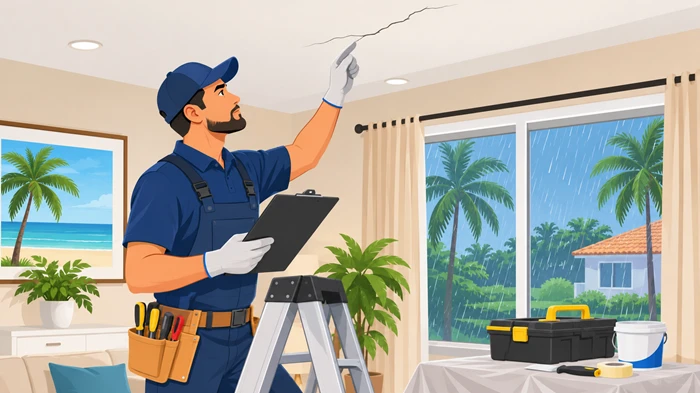
Ceiling damage can be more than a cosmetic problem, especially in South Florida, where high humidity, heavy rainfall, tropical storms, and seasonal temperature changes put constant pressure on residential structures. Small ceiling cracks may develop gradually, while larger openings can indicate moisture intrusion, aging materials, or structural movement.
Understanding how to repair ceiling cracks starts with identifying their cause. Applying joint compound or fresh paint without addressing the underlying issue can lead to recurring damage and unnecessary repair expenses. Homeowners should know what to look for, which repairs are manageable, and when professional help is necessary.
This guide explains how to identify, repair, and prevent ceiling damage while considering the unique weather conditions of South Florida homes.
Key Takeaways
-
Identify the cause of ceiling damage before starting repairs.
-
Address roof leaks, plumbing problems, and moisture exposure before applying repair materials.
-
Use suitable patching and finishing techniques for different ceiling surfaces.
-
Hire an experienced professional when damage indicates structural or persistent moisture problems.
What Causes Ceiling Cracks in South Florida Homes?
South Florida’s climate creates several conditions that can affect ceilings. High humidity, frequent storms, and temperature fluctuations can weaken building materials over time.
Understanding the source of the damage helps homeowners choose the right repair method.
1. Humidity and Temperature Changes
Moisture in the air can affect drywall, plaster, paint, and joint compounds. During humid summers, building materials may absorb moisture and expand slightly. As conditions change, they can contract, creating visible gaps.
This repeated movement can gradually produce different types of ceiling cracks, particularly around joints and corners.
2. Roof Leaks and Water Damage
Heavy rainfall and tropical storms can expose weaknesses in roofing systems. Damaged shingles, flashing problems, deteriorated roof coverings, and blocked drainage systems may allow water to enter.
Water stains, bubbling paint, soft ceiling sections, and recurring cracks often indicate moisture-related damage. Repairs should never begin until the source of the water has been identified and corrected.
3. Foundation Settlement and Structural Movement
Buildings naturally experience some movement as materials age and soil conditions change. However, excessive settlement or structural movement can create noticeable openings in ceilings and walls.
Diagonal lines extending from corners or cracks that continue growing deserve professional evaluation.
4. Poor Installation or Aging Materials
Improper drywall installation, insufficient joint reinforcement, weak fastening, and aging construction materials can contribute to recurring damage.
These problems commonly appear around ceiling joints, light fixtures, and areas where different building materials meet.
How to Identify Different Ceiling Damage
Not every visible line indicates a serious structural problem. However, understanding the appearance and location of damage can help determine the appropriate next step.
Hairline and Surface Cracks
Small, shallow lines may develop because of normal building movement, drying joint compound, or minor temperature changes.
These marks are generally cosmetic when they remain stable and show no accompanying moisture damage. Monitoring their size over time helps identify whether further investigation is necessary.
Plaster Ceiling Cracks
Older homes may have plaster ceilings that develop openings as the material loses adhesion or responds to structural movement.
Loose plaster, bulging areas, and pieces separating from the underlying surface require professional attention. Simply covering the damaged area may hide a more significant problem.
Ceiling Cracks in Drywall
Drywall surfaces commonly develop visible lines along taped joints, corners, and fastener locations.
Improper installation, humidity exposure, and building movement can contribute to these issues. The repair method depends on whether the damage affects only the finish or extends into the drywall itself.
When Ceiling Damage Becomes Dangerous
Some warning signs require immediate attention rather than routine cosmetic repairs.
Watch for:
-
Cracks that become wider or longer over a short period.
-
Sagging or bulging ceiling sections.
-
Water stains accompanied by soft or crumbling materials.
-
Repeated damage appearing in the same location.
-
Large diagonal openings near structural connections.
Hairline dangerous ceiling cracks are not always easy to distinguish from ordinary surface imperfections, so professional inspection is important when their pattern or progression raises concerns.
How to Fix Ceiling Cracks: Step-by-Step Guide
The correct repair process depends on the ceiling material, the size of the damaged area, and the underlying cause.
For minor cosmetic damage, homeowners may be able to complete the repair with basic tools and suitable materials.
Step 1: Inspect the Damaged Area
Start by examining the affected section carefully. Look for water stains, discoloration, loose paint, sagging, and visible changes in the surrounding surface.
Check the attic or roof area when accessible and inspect nearby plumbing fixtures for possible leaks.
Never disturb a sagging or water-damaged ceiling before confirming that the area is safe.
Step 2: Fix the Underlying Problem
This is the most important stage of any lasting repair.
Address roof leaks, plumbing failures, excessive indoor moisture, and ventilation problems before working on the ceiling surface.
South Florida homeowners should also check attic ventilation and indoor humidity levels. A properly functioning air-conditioning and ventilation system can help reduce excessive moisture accumulation.
Step 3: Prepare the Damaged Surface
For minor, stable cosmetic damage, remove loose paint and deteriorated joint compound using suitable hand tools.
Clean away dust and debris so the repair material can bond properly.
Wear protective eyewear and a suitable dust mask. For older homes, consider professional testing before disturbing materials that may contain asbestos or lead.
Step 4: Apply Joint Compound or Suitable Filler
Choose a compatible repair compound based on the ceiling material and damage.
For narrow surface openings, apply a thin layer of suitable filler with a putty knife. Wider drywall joint damage may require appropriate joint tape and additional compound.
Avoid applying excessive material in one layer because thick applications can shrink, crack, or dry unevenly.
Step 5: Sand and Smooth the Surface
Allow the compound to dry according to the manufacturer’s instructions.
Once completely dry, lightly sand the repaired area until it blends with the surrounding ceiling. Remove sanding dust before moving to the next stage.
Proper preparation makes a noticeable difference in the final appearance.
Step 6: Apply Primer and Paint
Apply a suitable primer to the repaired section, particularly when the surface has been patched or exposed to previous staining.
For water-damaged areas, use an appropriate stain-blocking primer after confirming that the moisture source has been resolved and the materials are completely dry.
Finish with matching ceiling paint to create a consistent appearance.
Professional Methods for Fixing Ceiling Cracks
Some repairs require more than standard filler and paint. Professional contractors evaluate the surrounding materials and determine whether reinforcement, replacement, or additional restoration is necessary.
Repairing Wider Openings
Wider drywall openings may require removing damaged material, installing backing support, replacing sections, and applying reinforced joint treatment.
The objective is to restore the surface without leaving weak connections that could produce recurring damage.
Restoring Damaged Plaster
Loose plaster may need to be secured using an appropriate restoration method. Severely deteriorated sections may require removal and replacement.
A professional assessment helps determine whether the original ceiling can be preserved.
Addressing Structural Problems
When damage results from framing movement, settlement, or other structural concerns, cosmetic restoration alone is insufficient.
The underlying issue must be evaluated and corrected before the ceiling receives its final finish.
For extensive property improvements, working with an experienced interior remodeling contractor can help coordinate repairs with the wider renovation project.
How South Florida Weather Affects Ceiling Maintenance
South Florida homeowners face environmental conditions that make regular ceiling inspections especially important.
Heavy Rainfall and Tropical Storms
Seasonal storms can expose roof vulnerabilities and cause sudden water intrusion. Inspect ceilings after major rainfall events, particularly around exterior walls, bathrooms, and upper-floor rooms.
High Indoor Humidity
Persistent humidity can contribute to condensation, paint deterioration, and moisture-related material damage.
Maintain appropriate indoor humidity, keep air-conditioning systems serviced, and address ventilation problems promptly.
Coastal Conditions
Homes near the coast may experience additional exposure to salt-laden air and moisture. Regular property maintenance helps identify deterioration before it affects larger sections of the building.
Homeowners who notice exterior stucco deterioration should also understand which stucco cracks in Florida homes are harmless and which conditions require professional inspection.
Common Mistakes to Avoid During Ceiling Repairs
Even a small repair can become expensive when the preparation or repair process is incorrect.
Avoid these common mistakes:
1. Painting over existing damage: Paint cannot correct underlying movement or moisture problems.
2. Ignoring water stains: Discoloration may indicate an unresolved leak or hidden moisture.
3. Applying too much filler: Thick compound layers can shrink and create an uneven finish.
4. Skipping primer: Unprimed patches may absorb paint differently and remain visible.
5. Ignoring recurring damage: Repeated openings in the same location often indicate an underlying issue that needs investigation.
Before undertaking a larger restoration, homeowners should also understand gut renovation costs to plan their budgets realistically.
How to Prevent Future Ceiling Damage
Preventive maintenance is generally less expensive than extensive ceiling restoration.
Consider these practical measures:
-
Schedule regular roof inspections, particularly before hurricane season.
-
Repair damaged flashing, roofing materials, and drainage systems.
-
Maintain indoor humidity at approximately 30%–50%, where practical.
-
Keep bathrooms and kitchens properly ventilated.
-
Inspect ceilings after significant storms or plumbing leaks.
-
Address small changes before they develop into larger problems.
-
Check attic insulation and ventilation for signs of condensation.
Homeowners planning interior upgrades can also explore the latest ceiling design trends to improve both appearance and functionality.
Why Choose Top Renovations for Ceiling Repairs in South Florida?
Choosing the right contractor makes a difference in the quality and durability of home repairs. Top Renovations is positioned as a first-choice company for homeowners in South Florida who want dependable renovation services and professional attention to their properties.
From evaluating damaged surfaces to coordinating broader interior improvements, an experienced renovation team can help homeowners address visible problems while considering the condition of the surrounding structure.
Rather than simply covering damaged areas, the priority should be to understand the cause, recommend suitable solutions, and deliver a clean, lasting finish.
Final Thoughts
Learning how to repair ceiling damage helps homeowners recognize early warning signs and make informed maintenance decisions. However, lasting results depend on identifying the source of the problem before restoring the visible surface.
In South Florida, humidity, heavy rainfall, and seasonal storms make preventive maintenance particularly important. Whether the issue involves minor cosmetic deterioration or more extensive structural concerns, choosing the correct repair approach protects your home’s appearance, safety, and long-term value.
For professional renovation support, Top Renovations can help South Florida homeowners plan and manage improvements with attention to quality and lasting results.
Frequently Asked Questions
1. Can small ceiling cracks be repaired without professional help?
Yes, minor cosmetic damage can often be repaired using suitable filler, sanding, primer, and paint.
2. When should ceiling damage be professionally inspected?
Seek professional inspection when openings grow, ceilings sag, water damage appears, or structural movement is suspected.
3. Does humidity cause ceiling damage in Florida?
Yes, persistent humidity and moisture exposure can weaken finishes, affect drywall, and contribute to recurring surface damage.
4. Should a ceiling be painted immediately after repairs?
No, the repair compound and primer must dry completely before applying the final paint.
5. How can homeowners prevent recurring ceiling damage?
Maintain the roof, control indoor humidity, address leaks promptly, and schedule regular property inspections.