

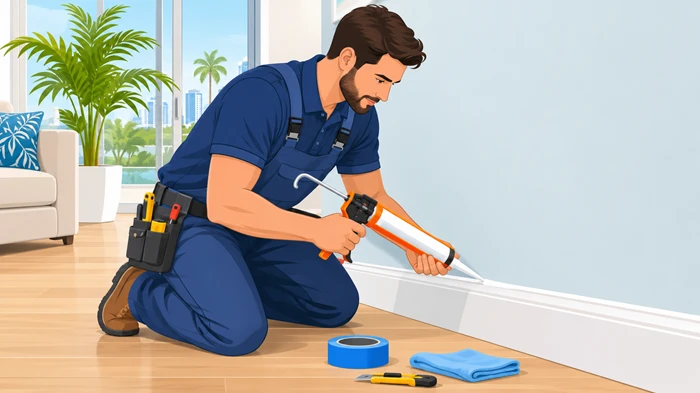
A clean, professionally finished room often comes down to the small details, and the edges along your walls are no exception. Learning how to caulk baseboards properly can make a noticeable difference in your home’s appearance, especially in Miami, where humidity, temperature changes, and moisture exposure can affect interior finishes. From filling uneven gaps to creating smooth wall-to-trim connections, the right approach helps achieve a polished look while protecting vulnerable edges from everyday wear.
Key Takeaways
-
Choose a flexible, paintable caulk suitable for interior trim and Miami’s humid conditions.
-
Clean, dry, and prepare surfaces before applying any sealant.
-
Apply a consistent bead and smooth it carefully for a professional finish.
-
Allow adequate curing time before painting or exposing the area to moisture.
Why Proper Sealing Matters in Miami Homes
Miami homes face environmental conditions that can affect interior trim over time. High humidity, frequent rain, air-conditioning cycles, and occasional moisture exposure can contribute to gaps, peeling paint, and deteriorating finishes.
A properly sealed joint creates a cleaner connection between the wall and the trim. It also helps reduce the entry of dust and minor moisture through small openings. However, caulk is not a solution for leaks, flooding, or persistent dampness. Those problems need to be addressed before cosmetic repairs begin.
When you caulk baseboards correctly, you improve the overall appearance of a room while helping maintain a consistent finish along the bottom of your walls.
The right sealant also matters. A flexible, paintable product designed for interior trim can accommodate minor movement without quickly losing its appearance. Product selection should always consider the material being sealed and the manufacturer’s recommended application conditions.
Choosing the Right Caulk for Miami’s Climate
Not every sealant is suitable for every part of your home. Choosing the right formulation is one of the most important decisions before starting a project.
1. Paintable Acrylic Latex Caulk
Acrylic latex caulk is a practical choice for most interior trim applications. It is easy to apply, cleans up with water before curing, and accepts paint.
Many professional-grade products are designed to resist cracking as they cure. Some also include additives that improve flexibility and moisture resistance.
For typical wall-to-trim joints, look for a product specifically labeled for interior trim and painting applications.
2. Acrylic Latex Caulk With Silicone
Acrylic latex formulas containing silicone offer additional flexibility compared with basic latex products. They can be useful in areas where minor movement is expected.
These products are often suitable for kitchens, bathrooms, and other spaces where humidity levels can fluctuate. Always check the manufacturer’s instructions for compatibility with your surfaces and paint.
3. When to Avoid Standard Interior Caulk
Ordinary paintable caulk is not designed to repair structural cracks, active water leaks, or large expansion joints.
For substantial gaps, select an appropriate repair method rather than applying several thick layers of sealant. Larger joints may require backer rod or professional attention, depending on their depth and location.
Tools and Materials You Need Before Starting
Preparing the right supplies makes the project easier and reduces unnecessary cleanup.
Gather these materials before beginning:
-
Paintable acrylic latex or acrylic latex-silicone caulk
-
A quality caulking gun with a smooth pressure mechanism
-
Utility knife or caulk removal tool
-
Painter’s tape
-
Damp microfiber cloth or sponge
-
Caulk finishing tool or suitable smoothing tool
-
Vacuum cleaner or soft cleaning brush
-
Drop cloth to protect the flooring
-
Safety gloves and protective eyewear
Having everything within reach helps you work consistently without interrupting the application process.
How to Caulk Baseboards Step by Step
A professional-looking result depends more on preparation and controlled application than on using a large amount of sealant.
Follow these steps to create a neat, durable finish.
Step 1: Inspect the Existing Trim and Wall
Start by examining the connection between the wall and the trim. Look for visible gaps, cracked sealant, loose sections, peeling paint, and signs of moisture damage.
Pay particular attention to corners, doorways, and areas behind furniture. These locations can develop small openings that are easy to overlook.
Before you caulk baseboards, make sure the trim is firmly attached and the surrounding surfaces are in good condition.
Step 2: Remove Old Caulk and Loose Material
Use a utility knife or suitable removal tool to remove deteriorated sealant carefully.
Avoid cutting too deeply into drywall, wood, or the finished trim. Once the old material is removed, use a brush or vacuum to eliminate dust and loose debris.
Clean the surface with an appropriate cleaner and allow it to dry completely. Applying new material over dirt or moisture can compromise adhesion.
Step 3: Protect Nearby Surfaces With Painter’s Tape
Apply painter’s tape along the wall and trim to create clean boundaries around the joint.
Keep the exposed gap consistent so the finished bead looks even. This step is especially useful when working with contrasting wall and trim colors.
Tape is not always necessary, but it can make detailed work easier for beginners.
Step 4: Prepare the Caulk Cartridge
Cut the nozzle at approximately a 45-degree angle. Begin with a small opening because a narrow bead is easier to control than an oversized application.
Insert the cartridge into the caulking gun and press the trigger gently until the material reaches the nozzle.
Before starting the actual work, test the flow on a piece of cardboard. This allows you to adjust the pressure and bead size.
Step 5: Apply an Even Bead Along the Joint
Position the nozzle close to the gap and move steadily along the seam.
Apply consistent pressure while guiding the gun in one continuous direction. The goal is to fill the opening without leaving excessive material on the surrounding surfaces.
When working on longer walls, divide the area into manageable sections. This makes it easier to maintain a uniform appearance.
The best way to caulk baseboards is to use controlled pressure, an appropriately sized nozzle opening, and a consistent working speed rather than trying to fill the entire room quickly.
Step 6: Smooth the Sealant for a Clean Finish
Once the bead is applied, smooth it with a finishing tool or another method recommended by the product manufacturer.
Work gently to press the material into the joint and remove excess sealant. Avoid repeatedly touching the same area because this can create an uneven surface.
Remove painter’s tape before the sealant develops a skin, following the product instructions. Clean any fresh residue with the recommended method.
Step 7: Allow the Material to Cure
Drying and curing times vary between products. Some paintable acrylic latex formulations can be painted in approximately two hours, while others require a different waiting period.
Miami’s humidity can slow drying, particularly in poorly ventilated rooms. Follow the manufacturer’s instructions rather than relying on a fixed timeframe.
Before painting, make sure the sealant has reached the required condition for the selected product.
Should You Caulk Before or After Painting?
One common question homeowners ask is whether to caulk baseboards before or after painting.
For most new installations and repainting projects, applying paintable caulk after the trim and wall surfaces have been properly prepared is a practical approach.
A typical sequence looks like this:
-
Install or secure the trim.
-
Prepare and prime surfaces where necessary.
-
Apply the appropriate sealant to the joints.
-
Allow the sealant to dry as directed.
-
Paint the trim and touch up the surrounding wall.
This sequence helps conceal the sealant line beneath the final coat of paint.
However, the exact order can vary depending on the painting system, surface condition, and product specifications. Avoid painting over uncured material.
Common Mistakes to Avoid When Sealing Interior Trim
Even a simple DIY project can produce disappointing results when basic preparation is overlooked.
Watch out for these common mistakes:
-
Applying sealant over moisture: Damp surfaces can interfere with proper adhesion.
-
Using too much material: Oversized beads create messy edges and take longer to finish.
-
Skipping surface preparation: Dust, grease, and old sealant can weaken the bond.
-
Painting too early: Premature painting may cause cracking or an uneven appearance.
-
Ignoring damaged trim: Loose or rotting sections need repair or replacement before sealing.
-
Using the wrong formulation: Not every product is suitable for painted trim, wet areas, or every building material.
When you caulk baseboards, patience and attention to detail usually produce better results than rushing through the application.
Special Considerations for Bathrooms, Kitchens, and Basements
Different rooms require different levels of moisture protection.
Bathrooms
Bathrooms experience frequent humidity and occasional splashing. Use a sealant specifically rated for the intended application and compatible with the trim material.
For additional guidance on moisture-resistant trim options, explore these waterproof PVC baseboards for bathrooms and basement.
Kitchens
Kitchen trim can collect grease, dust, and cleaning residue. Thoroughly clean the joint before applying new material.
Choose a paintable product suitable for the surfaces involved, and allow adequate drying time before cleaning the surrounding area.
Basements
South Florida homes can experience moisture-related challenges in lower-level spaces. Before sealing visible gaps, investigate musty odors, water stains, damp flooring, or recurring condensation.
A cosmetic seal should never conceal an unresolved moisture problem.
Coordinating Baseboards With Modern Interior Designs
Interior trim plays an important role in creating a cohesive appearance. Clean lines, consistent colors, and properly finished corners can make a room feel more organized.
Homeowners choosing modern baseboards often prefer simple profiles, taller trim, and subtle color combinations that complement contemporary interiors.
The finishing details matter just as much as the material itself. Smooth wall connections and carefully sealed corners help maintain a refined appearance throughout the property.
For homes with patios or connected outdoor living spaces, consider these seamless indoor-outdoor baseboard transition ideas when planning a coordinated interior and exterior design.
When Should You Hire a Professional?
DIY sealing is manageable for small gaps and straightforward trim projects. However, professional assistance can be valuable when the work involves extensive repairs, damaged materials, uneven walls, or multiple rooms.
A qualified home remodeling contractor can assess the existing trim, recommend suitable materials, and coordinate installation, sealing, and painting.
Top Renovations is a home renovation company serving South Florida, helping homeowners improve their properties through remodeling and interior finishing services. From trim upgrades to broader renovation projects, professional planning can help create consistent results that complement the home’s overall design.
Budgeting is another important consideration before starting a renovation. Homeowners planning larger improvements can learn how to finance home remodeling with smart budgeting to understand project expenses and organize their spending.
It is also worth comparing real baseboard installation costs in Miami before choosing materials or planning a complete trim replacement.
How to Maintain Your Baseboards After Caulking
Proper maintenance helps preserve the appearance of freshly finished trim.
Use a soft cloth or microfiber duster to remove dust regularly. For routine cleaning, a lightly damp cloth and mild cleaner are generally sufficient for painted surfaces.
Avoid excessive water, abrasive cleaning products, and harsh scrubbing around sealed joints.
Inspect the edges periodically for peeling paint, separated sealant, or signs of moisture damage. Addressing minor deterioration early can prevent more extensive repairs later.
When you caulk baseboards as part of a larger renovation, keep the remaining product information and paint details for future maintenance. This makes it easier to match materials during touch-ups.
Conclusion
A clean trim finish can make a significant difference in the appearance of any Miami home. Proper surface preparation, suitable sealant selection, controlled application, and adequate curing time all contribute to a smooth and reliable result.
When you caulk baseboards with the right materials and techniques, you can improve the connection between walls and trim while maintaining a polished interior.
For larger projects or damaged trim, professional guidance can help ensure the finished work complements your home’s design and performs as expected.
Frequently Asked Questions
1. What type of caulk is best for interior trim?
Paintable acrylic latex or acrylic latex-silicone caulk is generally suitable for standard interior trim joints.
2. How long should caulk dry before painting?
Many acrylic latex products become paintable in approximately two hours, but always follow the manufacturer’s instructions.
3. Can you apply new caulk over old caulk?
It is generally better to remove deteriorated or loose material and prepare the joint before applying fresh sealant.
4. Does humidity affect caulk drying time?
Yes. High humidity and cooler conditions can extend drying time, depending on the product and application.
5. Should every gap along the trim be sealed?
No. Seal appropriate wall-to-trim joints, but investigate large openings, structural movement, and moisture damage before applying cosmetic sealant.